RV Remodel
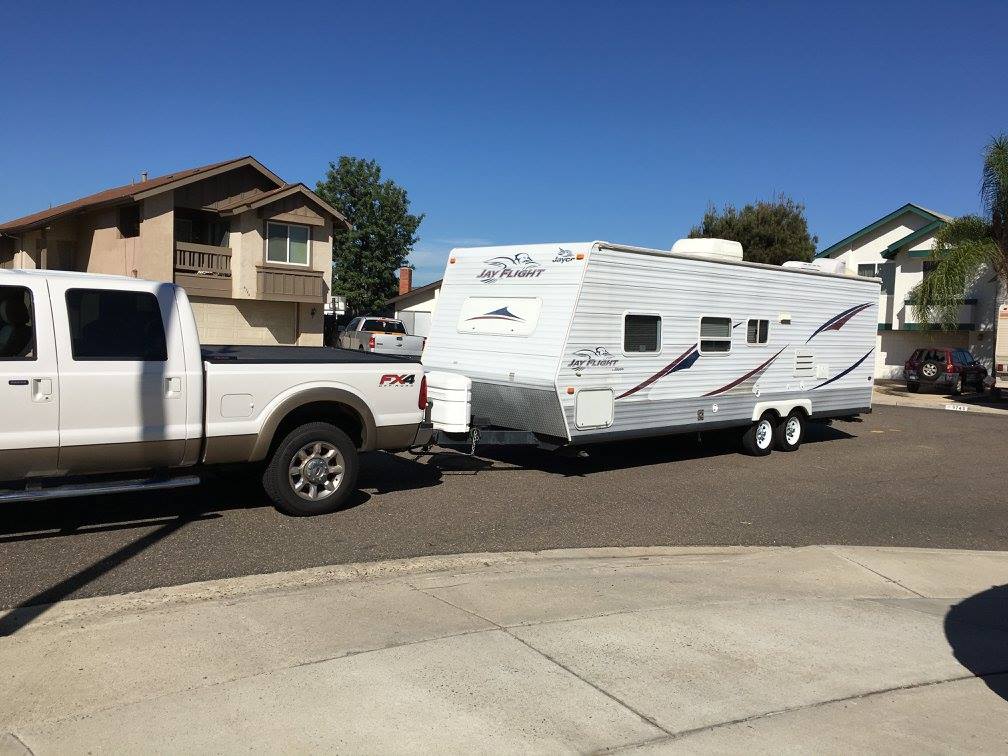
Here’s where we left off: we recently sold our 34’ 5th wheel and opted for a smaller and cheaper alternative. So we found a great deal on a 27’ travel trailer in San Diego, but she’s a 2006 and needed some updating. But we were lucky that she was used lightly and taken good care of. No systems needed to be replaced or fixed – she just needed a facelift.
Paint

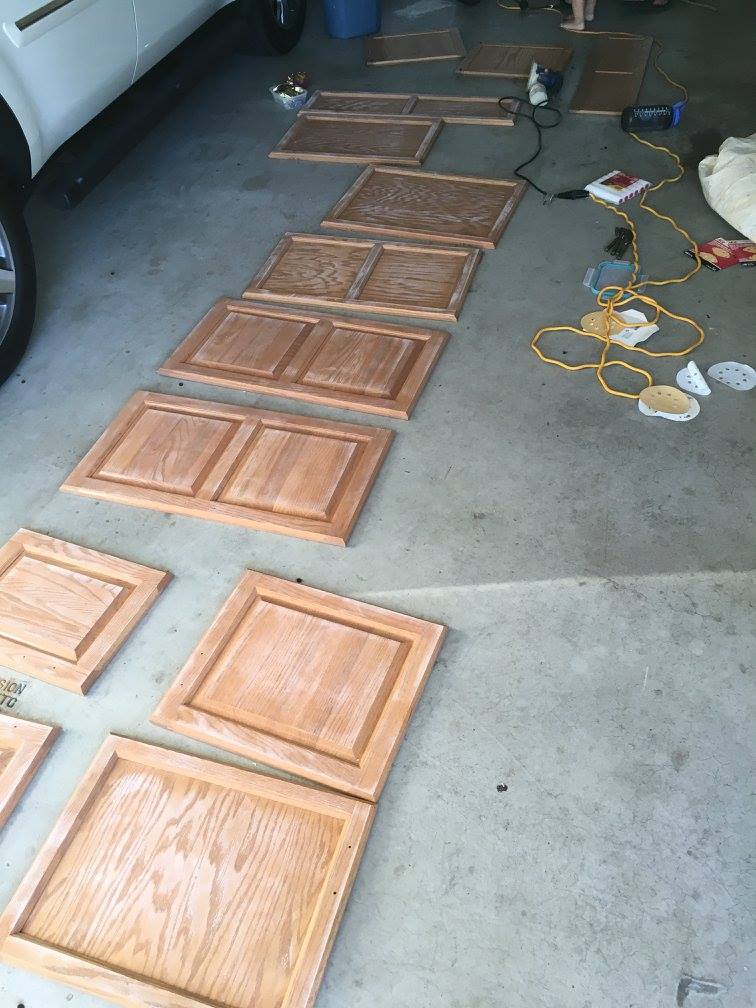
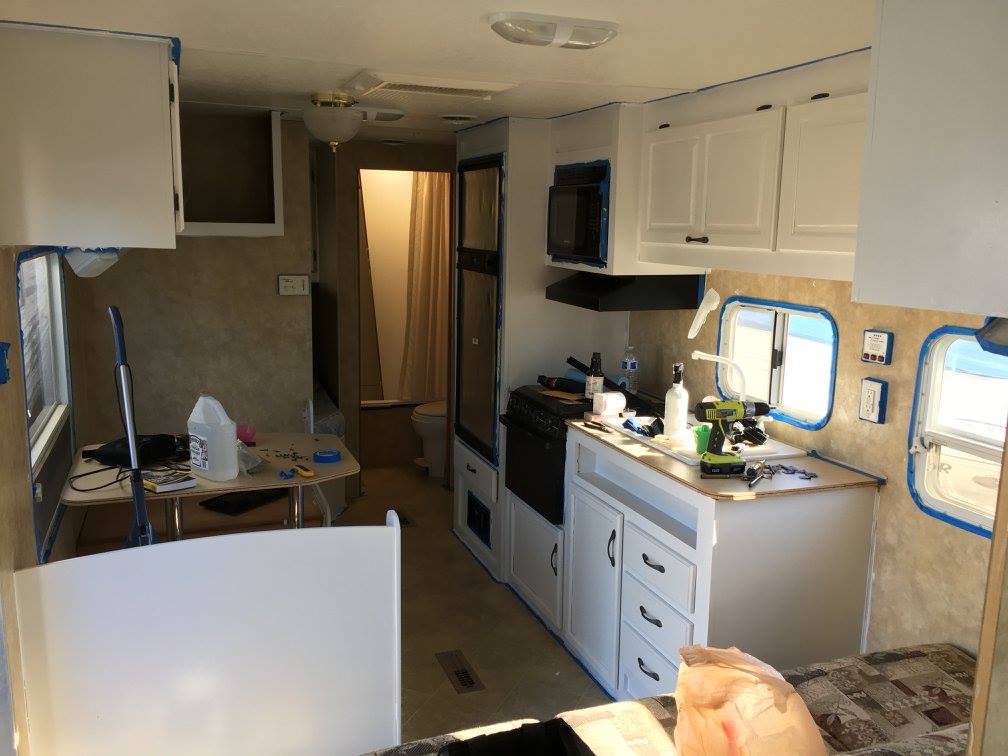
Our outdated walls and cabinets got the first round of love. I removed the cabinets (the trailer was in storage) and brought them back to Erin’s parents house to get painted. Sanding went pretty quick with an electric palm sander Erin’s dad had. We opted for a Behr paint and primer in one and the cabinets took the paint pretty well. It required a little touch-up after the fact, but not bad at all.
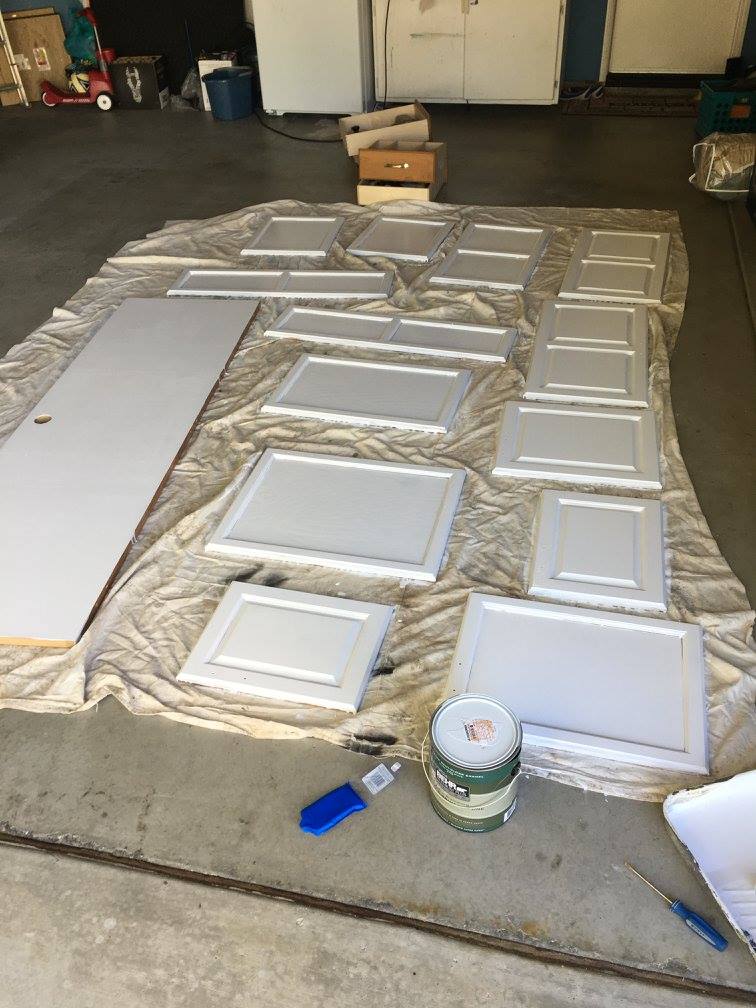

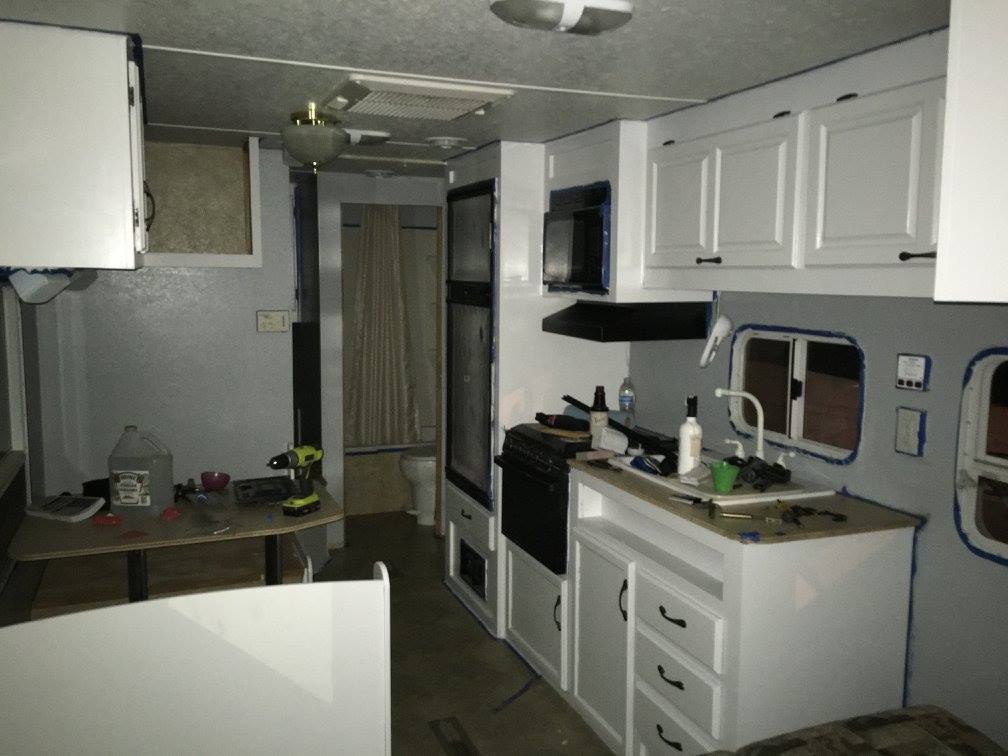
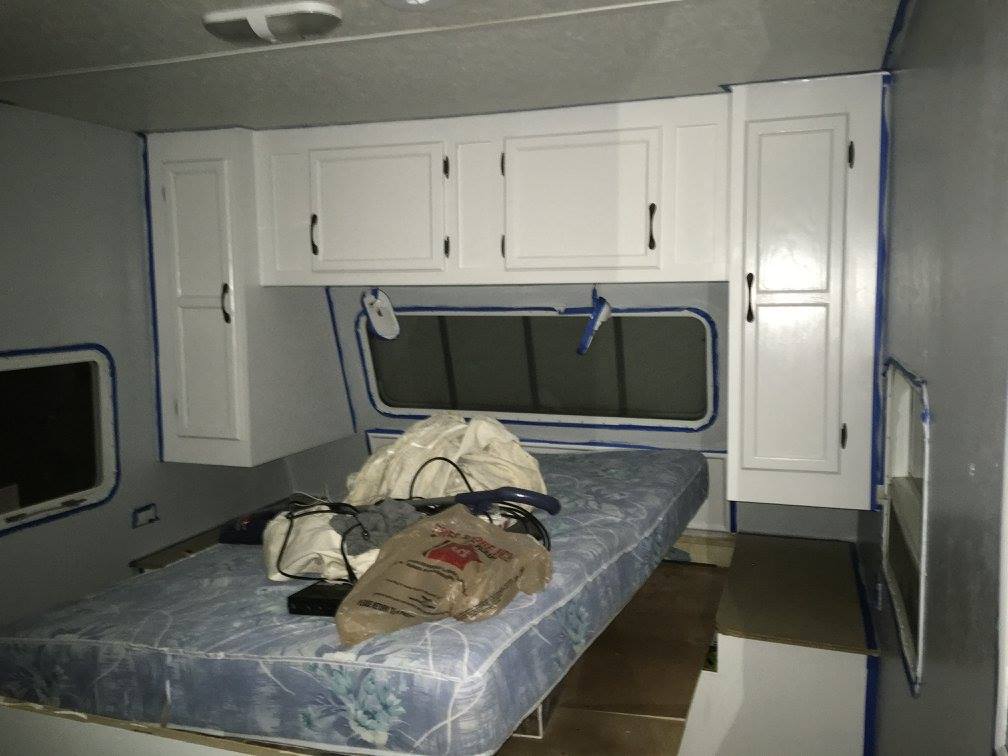
We also opted to keep the hardware from the cabinets and paint those as well. We stripped them as best as we could and used a Rust-o-leum metallic spray paint. The results were decent, but we decided to go ahead with “good enough”.
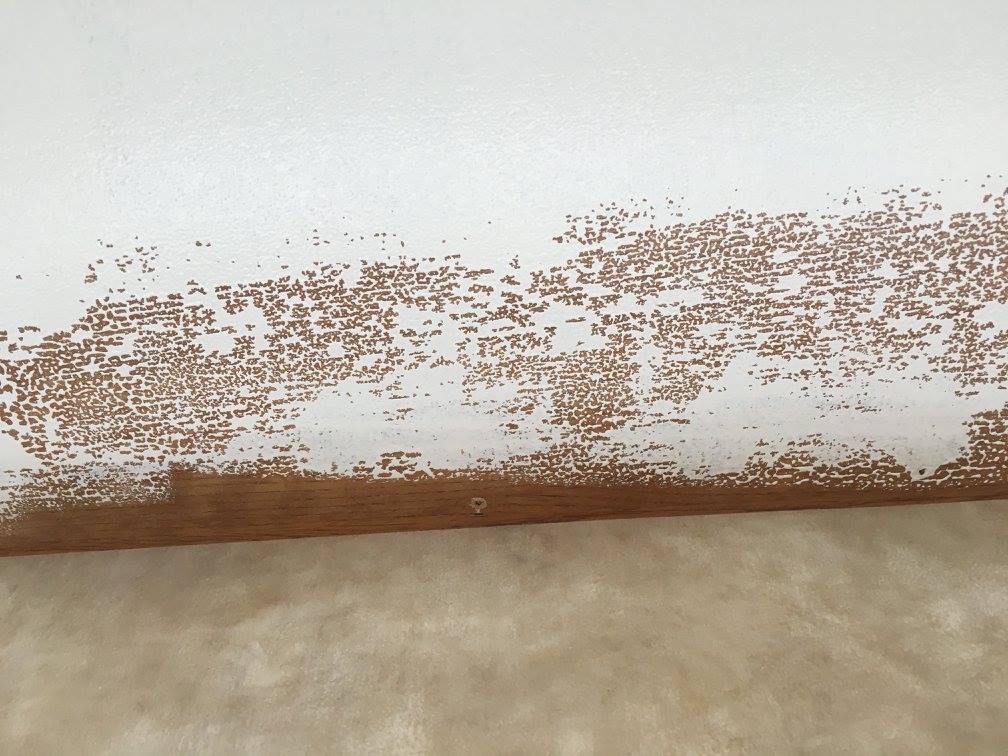
The only snag I hit painting was in a few spots under the cabinets. The paint decided to instantly separate once it was applied. My best guess was that there was some oil in the wood in these spots that was leeching out. I tried over-painting it, which worked in most places, but not in all. File this one under “good enough”, too.
Flooring
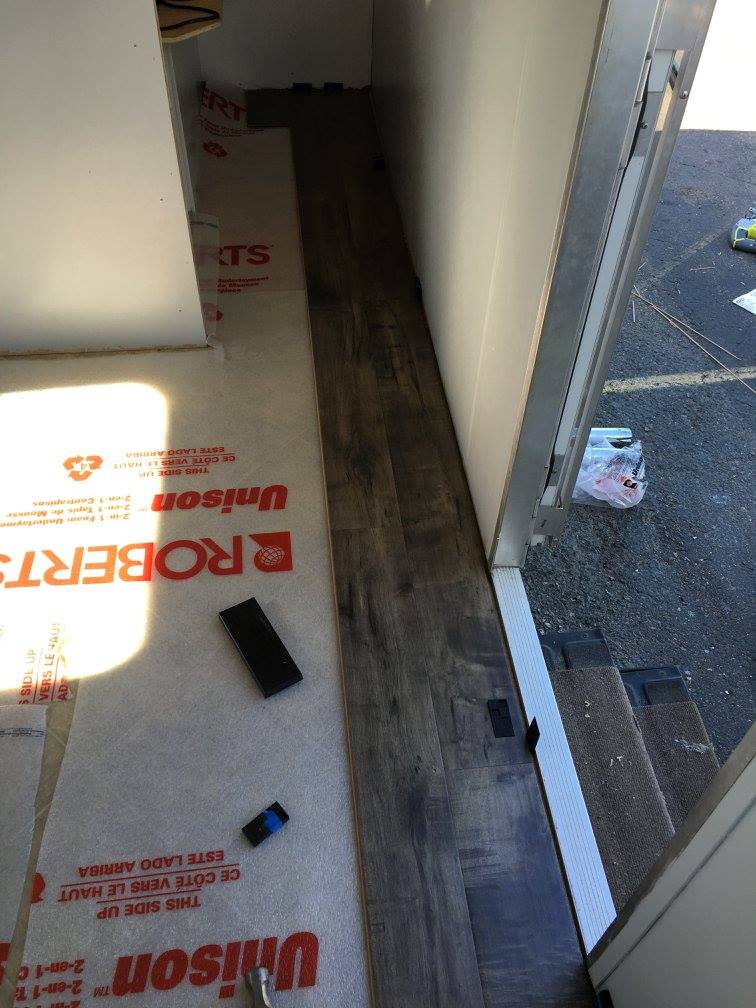
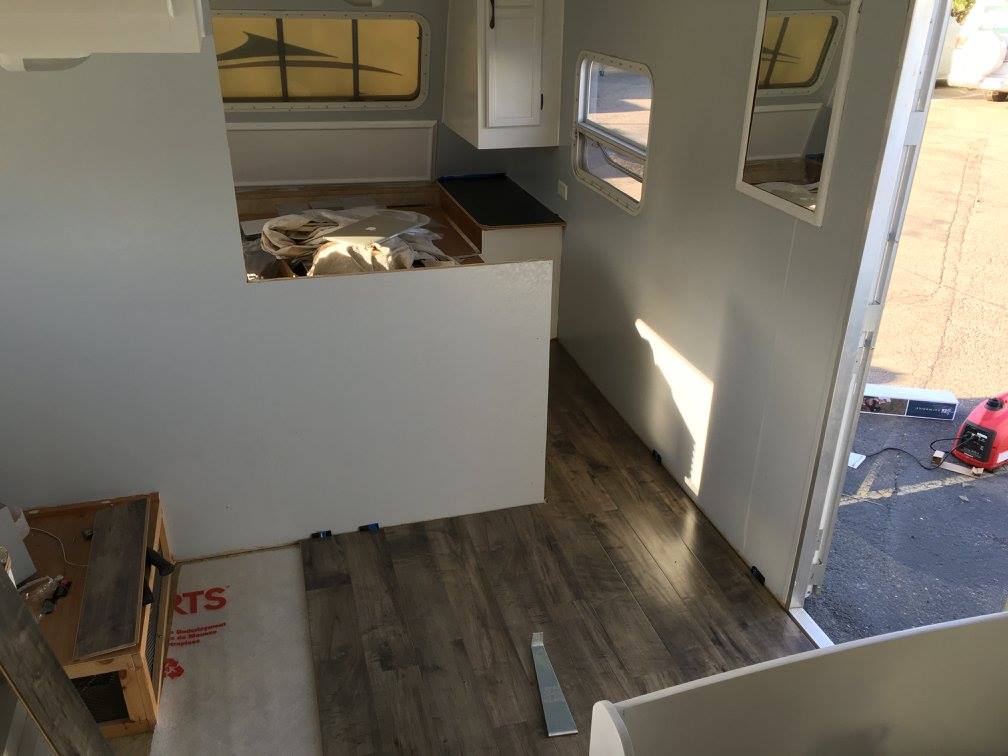
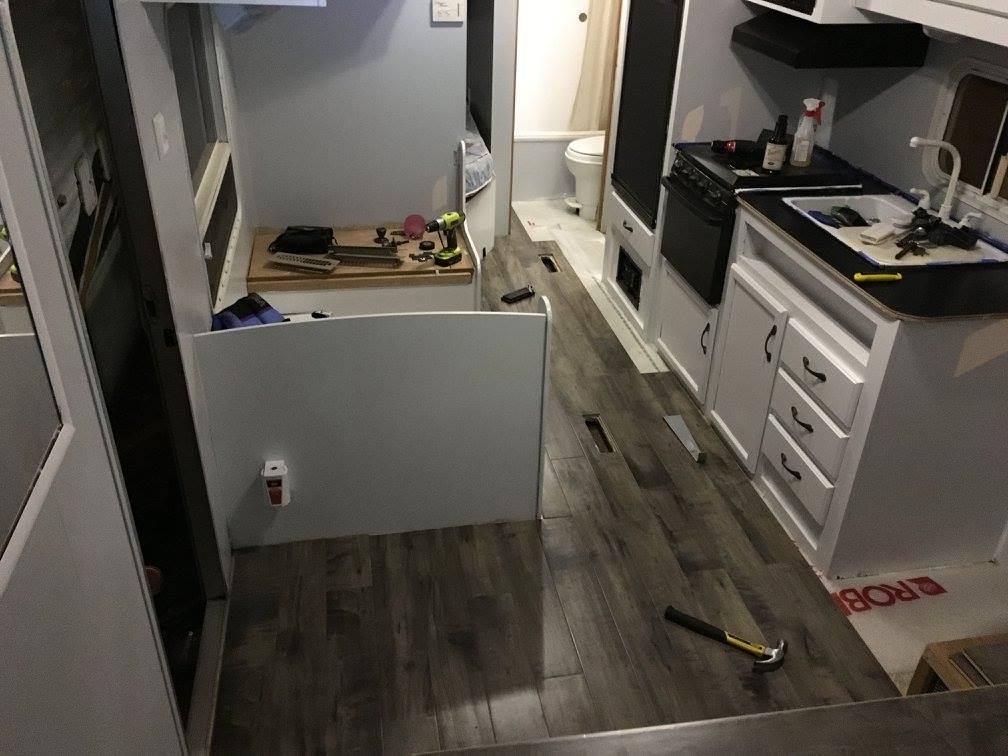
We originally put “flooring” on the long-term list, but after seeing the state of the carpet in the bedroom – and the fact that we wanted to paint the walls all the way to the floor – we opted to tack it on.
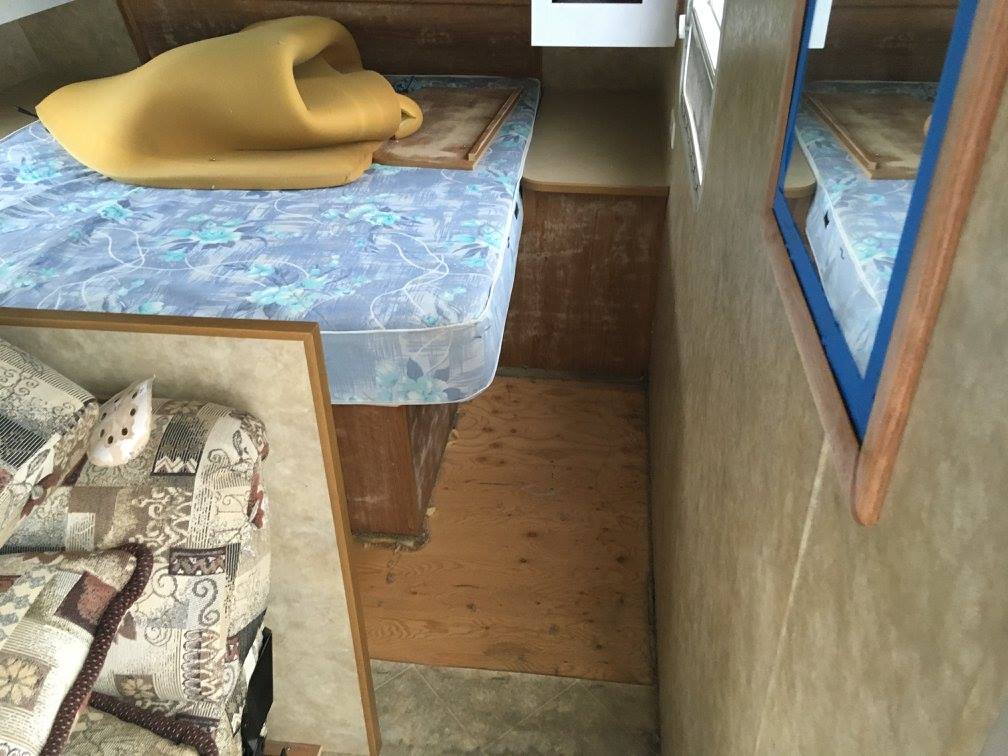
To be honest, I had nightmares about flooring for about 2 weeks before starting the project. Every video I watched on YouTube showed a guy putting down laminate wood flooring in a nice, square room. Start in one corner and work your way out. But my floor had obstacles in it every few feet – a dinette, a wall, a bed, a cabinet. None of these could be moved, so I knew I’d be cutting a lot of planks to fit.
We bought some laminate flooring from Costco and I bought a mitre saw off Craigslist for $40 (cheaper than a day rental from Home Depot). I started by laying down the underlayment, then got to work laying the first and second rows. These went down pretty easy because of where I chose to start – along the passenger side wall by the front door. Nothing was easy after that. I probably spent as much time trying to visualize cuts and problem solve than I actually did laying anything down. It required some mental gymnastics, but I got it done over 3 nights at the trailer. There are a few parts I wish I could re-do, but … “good enough”.
Solar
This is the project I was most looking forward to. Well, I wasn’t excited about putting holes in my roof, but I was excited about the end result. We spent the first 6 months on the road with a single 100W Renogy suitcase solar panel and charger. It worked ok for the most part, but I had to get up each morning and deploy it (I pakced it up at night to prevent theft) and at only 100W, we rarely ever got back up to full charge. So strapping 300W to the roof was a big step up for us.
We’ve heard amazing things about AM Solar in Oregon. Their solar kits are top-notch and they provide excellent support if you opt to install yourself. But the dream kit we want weighs in at around $2,000 and we were on a budget. So instead, we opted for a cheaper 300W MPPT Renogy kit.
The biggest issue was how to run the cables from the roof, to the charger, then out to the batteries. I opted to mount the charger in the front storage area underneath the master bed on the driver side. I cut a small piece of plywood and mounted the controller to that. I was able to run the thick 8-gauge cable from the controller to the battery by popping a small hole in the black covering below the front diamond plate behind the batteries. Not the cleanest way to run the cable, but … good enough. Now the fun part – a hole in the roof. The length of cable provided to me for this run was pretty short, so running the cable down the fridge vent wasn’t an option unless I wanted to buy a bunch more cable and deal with running the cable from the back near the fridge all the way to the front where the controller was. So I opted to drill a hole inside my closet (driver side) and up to the roof. I have a long history of drilling and missing. My past is littered with bad patch jobs from trying to drill into studs. I’m not proud of it and drilling up and into the roof scared the heck out of me. But after measuring and re-measuring a few times, I managed to drill up and out the top of the roof in the right spot.
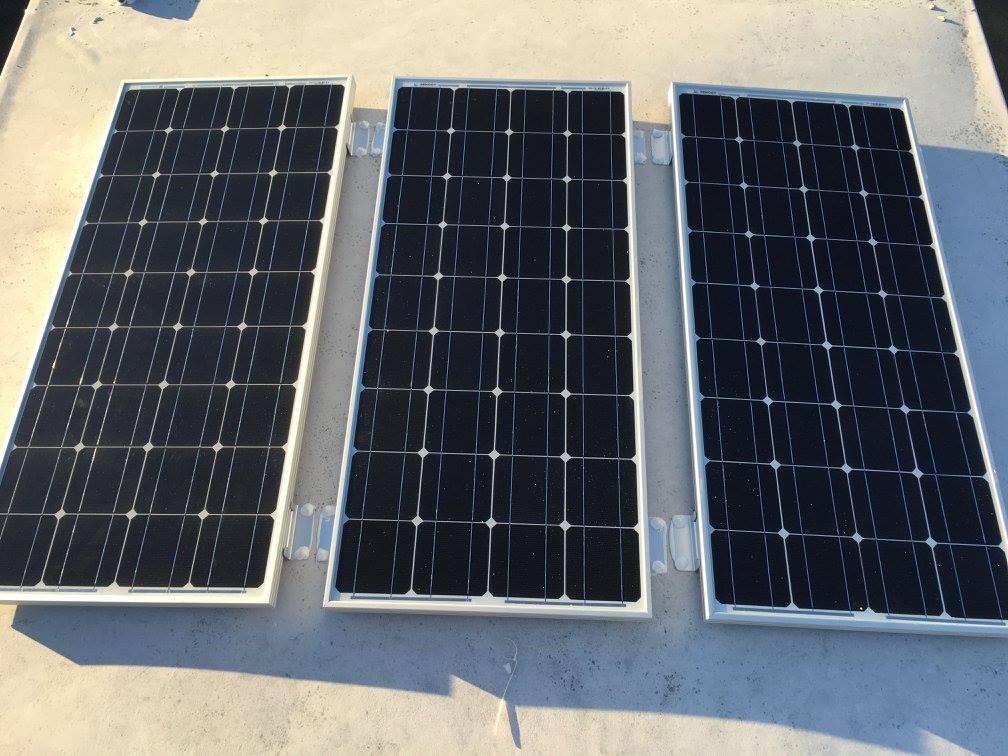
I grabbed an outdoor metal wiring box to run the cable down and through the hole. In retrospect, I wish I had installed a slightly larger box because the wire only barely fit through the box. I sealed the hole with a ton of Dicor and moved on to the panels.
My mistake here was to attach the panels to the roof before wiring them together. Once they were screwed down, I only had about a half inch of clearance underneath them – not quite enough to get the wires to come together. So I unscrewed the middle one to get them wired up. And behold! The sun shown down and gave us electricity!
Mattress
Not a lot to tell here, but yeah … mattress. The ones that the trailer came with were old spring mattresses that sucked. So we decided to throw down for an upgrade. This 10-inch memory foam mattress fit the bill. Ironically, it’s kind of heavy and makes lifting the bed to get at the underneath storage a bit of a pain. I’ll fix that later. Every time I go into the bedroom to fix it, I decide instead to take a nap. It’s that comfortable.
Axles
Finally, “repack the axles” came up on the TODO list. I read a few blog posts and watched a handful of videos and decided I was very much done being handy. And I didn’t want to screw this up. I found a RV repair 5 minutes from the RV storage place that had a 4 star review on Google. They charged me $270 to repack all 4 wheels. Not bad for the peace of mind.
Final Touches
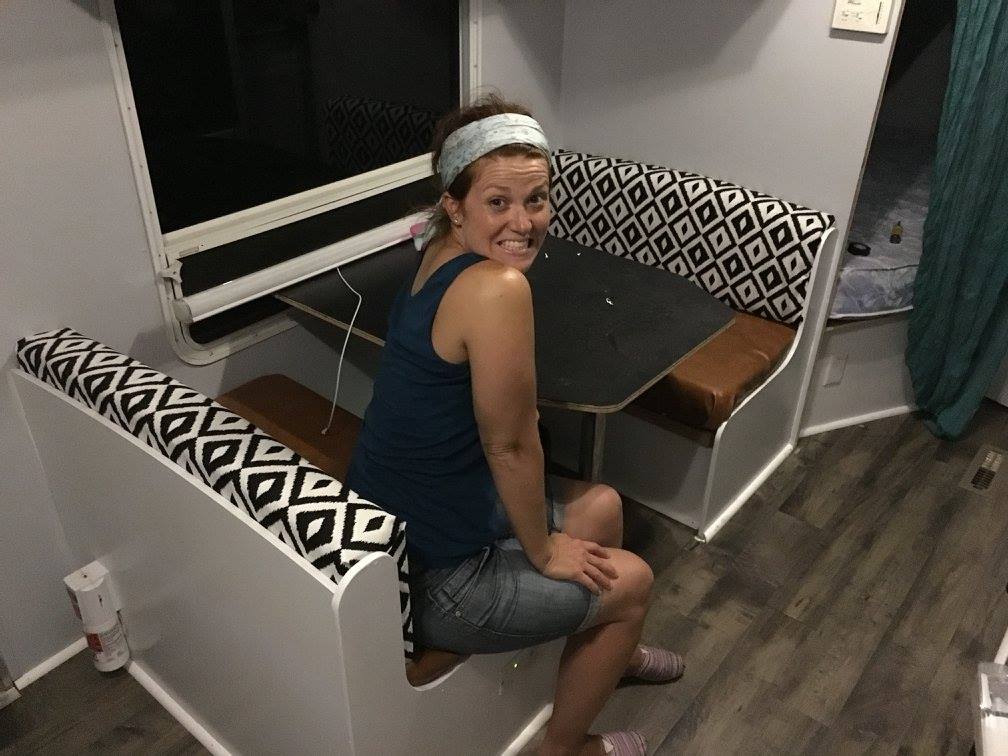
Erin was in charge off re-covering the dinette cushions, and all the nice finishing touches. She ordered some fabric online and covered over the existing coverings. I think they turned out great!
By The Numbers
Drum roollllllll… the numbers!
- Replace all light bulbs for LED: $29.18
- 12v Cigarette Socket Panel installed beneath the dinette: $16.63
- Storage bench from IKEA to replace couch: $130.60
- 300W Renogy Solar Kit: $751.40
- Dicor: $11.04
- Flooring underlayment: $21.20
- Laminate flooring from Costco: $139.95
- Mitre saw off Craigslist: $40
- Curtains to replace accordion room separators: $50
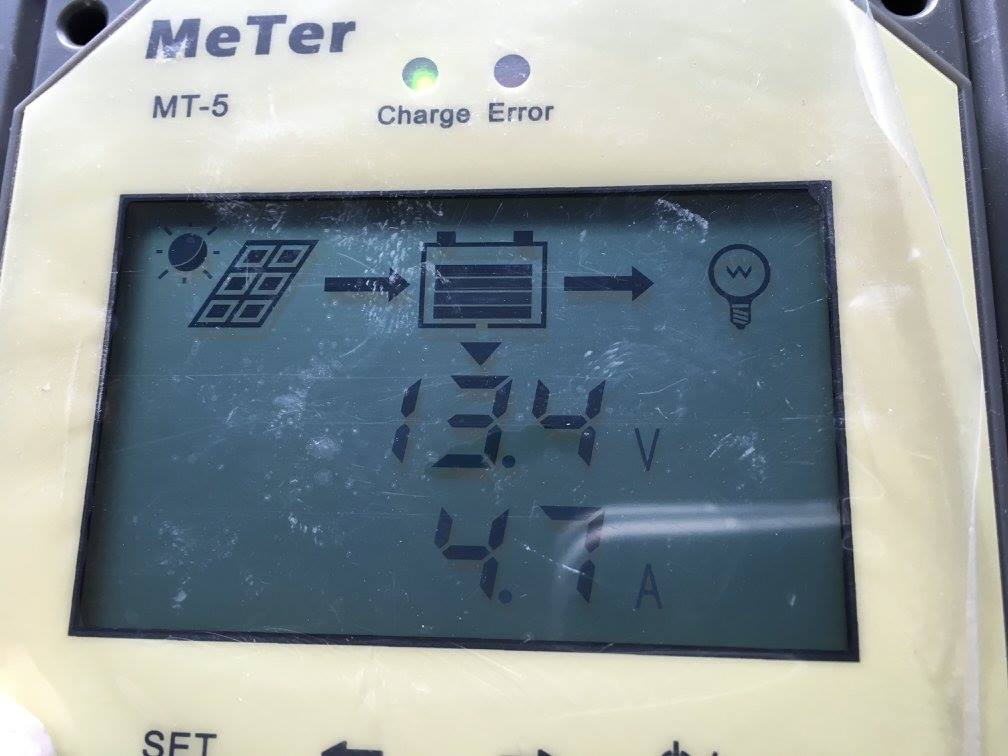
- Renogy MT-5 tracer meter for charge controller: $39.99
- Fabric to recover dinette cushions: $69.79
- New battery boxes and carpet for entry steps: $28.30
- New mattress: $355.00
- Misc (aka “all those random things you have to get from Home Depot”): $1,201.39
TOTAL: $2,884.47
Yeah, that “misc” category was no joke. Every trip to Home Depot was $80 here, $60 there. I lost track of all the different tiny things I had to buy: finish nails, plywood, new saw blade, flooring install kit, spackle, and on and on. If you’re gonna do a project like this, make sure to set aside a good chunk for these odds and ends – especially if you’re on the road and your tool set is limited.
A Dry Run
We decided to stay close to family our first week and give everything a test run. We booked 4 nights at Lake Skinner Recreational Area with full hookups. I knew the electrical system worked, but had no way to test out water and sewer. Once we arrived, I pulled our new sewer hose from its box and kneeled down to unscrew the sewer cap from the drain. As I turned it, a deluge of “fluid” began to pour out and onto the ground. I quickly screwed it back on.
My next move was critical. I stood up, stared at the situation, and scratched my head.
Why on earth was there “fluid” coming from the drain when the valves were closed? Oh crap (pun). Was the black tank valve busted? That would not be good. First things first: see how much fluid is in there. I slowly unscrewed the cap again, while positioning the sewer hose beneath. I let the fluid drain out and into the hose – I’ll be generous and say I caught about 95% of it all. Thankfully, just “fluid” and no solids. (real talk, right?)
I hooked up the hose afterwards and decided to run a few tests. First, I made sure the black tank valve was closed. Then, I had Erin flush the toilet and hold it down while I listened to the hose for water. I didn’t hear rushing water. Good sign. Next, I slowly unscrewed the sewer hose. No water. Then I had Erin flush again. No water. PHEW! So both valves are ok. The previous owner must have used the toilet at some point and someone decided to open the black tank valve when not actually dumping the tanks. So what I got was a nice little parting gift.
TODO List
As our “re-launch” date loomed, our TODO list seemed to grow longer and longer. But now that we’re on the road again, I think our priorities have shifted. We don’t want this trailer to be perfect. We want it to be livable. We both agree that if everything was perfect, we’d spend most of our time yelling at our kids when they scratched, dented, or spilled. So no, I’m not going to touch-up the paint on the baseboard. And I’ll get around to finishing off the counter-top edging when I get bored and need a project. But for now, I think it’s time to take a break from it all and enjoy this crazy life we call “normal”.
See you down the road!
To see all the photos from the remodel, view this gallery on Facebook.

Hi there, I'm Jon.
Writer. Musician. Adventurer. Nerd.
Purveyor of GIFs and dad jokes.